HOW QR-APPY WORKS

How to Create a QR Menu and Online Catalog in QR-Appy

Follow exact dashboard buttons to create a business, add products, publish the catalog, check the customer page, and download a QR poster.

Set Up QR-Appy in 7 Steps

Follow the steps in order. Each button shows its purpose and the expected result.

01

Create your business

Create an account first. You can add contact details and links later in the dashboard.

What to click

  1. “Start”Sign up and open your dashboard.
  2. “Create business”Enter the name, address, and time zone for your customer page and reports.
  3. “Business settings” → “Save changes”Add a logo, phone, Instagram, website, and up to three addresses.
ResultYour customer page shows the business name and quick contact and directions buttons.
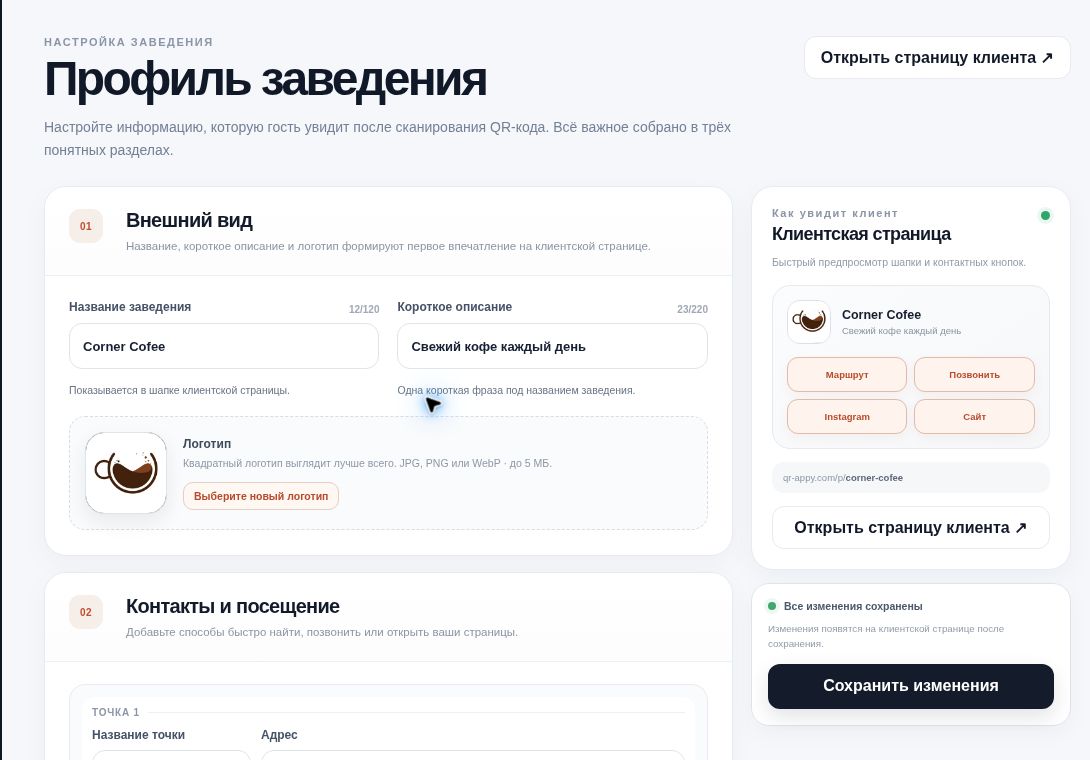
Business profile with name, addresses, contacts, and save button
02

Add products to the catalog

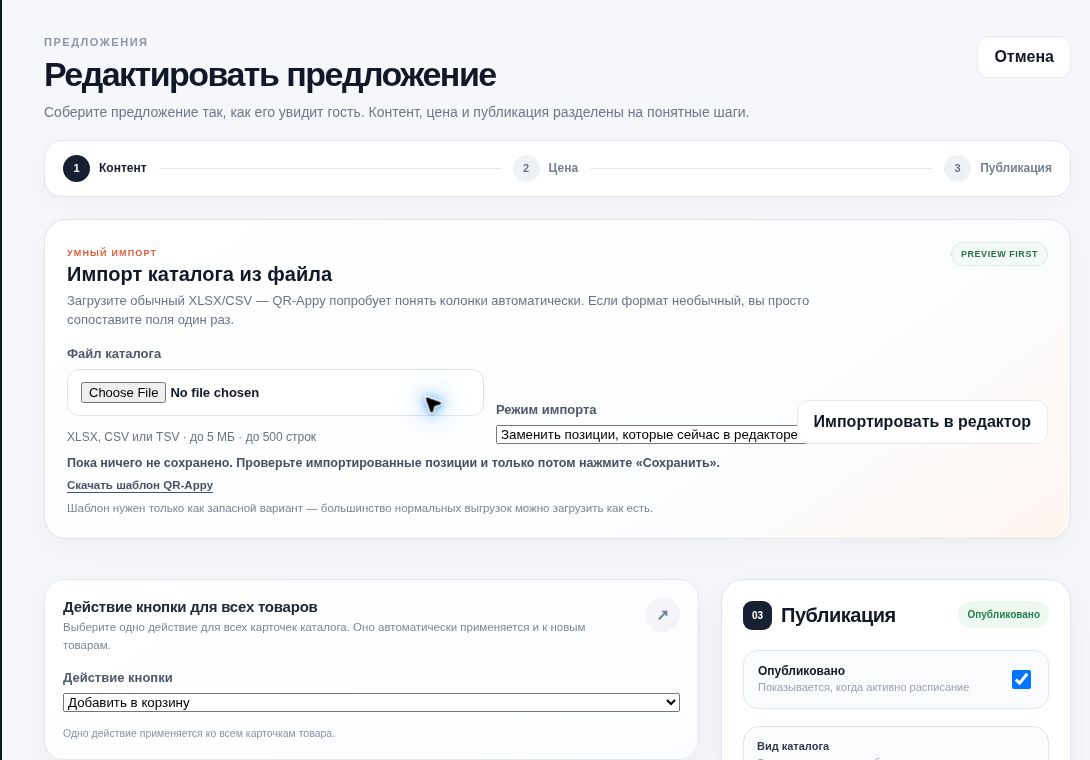
Add products one by one or import an XLSX, CSV, or TSV file. Imported items appear in the editor before you publish.

What to click

  1. “Catalog” → “+ Create catalog”Open the editor for a new catalog.
  2. “Add another item”Enter a product name, category, description, image, and price.
  3. “Catalog file” → “Import mode” → “Import into editor”Upload a spreadsheet, choose to replace or append items, and review the result.
ResultItems are in the editor. Importing alone does not save or publish the catalog.
Product editor with catalog import and add-item button
03

Choose the look and publish

Decide how products appear and what each product button should do before publishing.

What to click

  1. “Button action for all products”Choose “Add to cart” for QR-Appy orders, “Open a link” for an external shop, or “No button”.
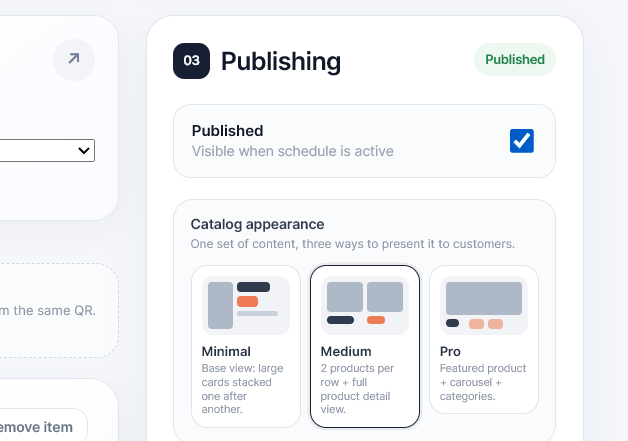
  2. “Catalog layout” → Minimal, Medium, or ProChoose the layout and, if you like, adjust the catalog color.
  3. “Published” → “Publish catalog”Make a new catalog available to customers. Use “Save changes” for later edits.
  4. “View as customer”Check product names, categories, prices, and buttons on the live page.
ResultThe published catalog opens through your business's permanent link and QR code.
Minimal, Medium, and Pro catalog layouts before publishing
04

Enable orders and notifications

Do this if products use the QR-Appy cart. You can skip it when product buttons only open an external website.

What to click

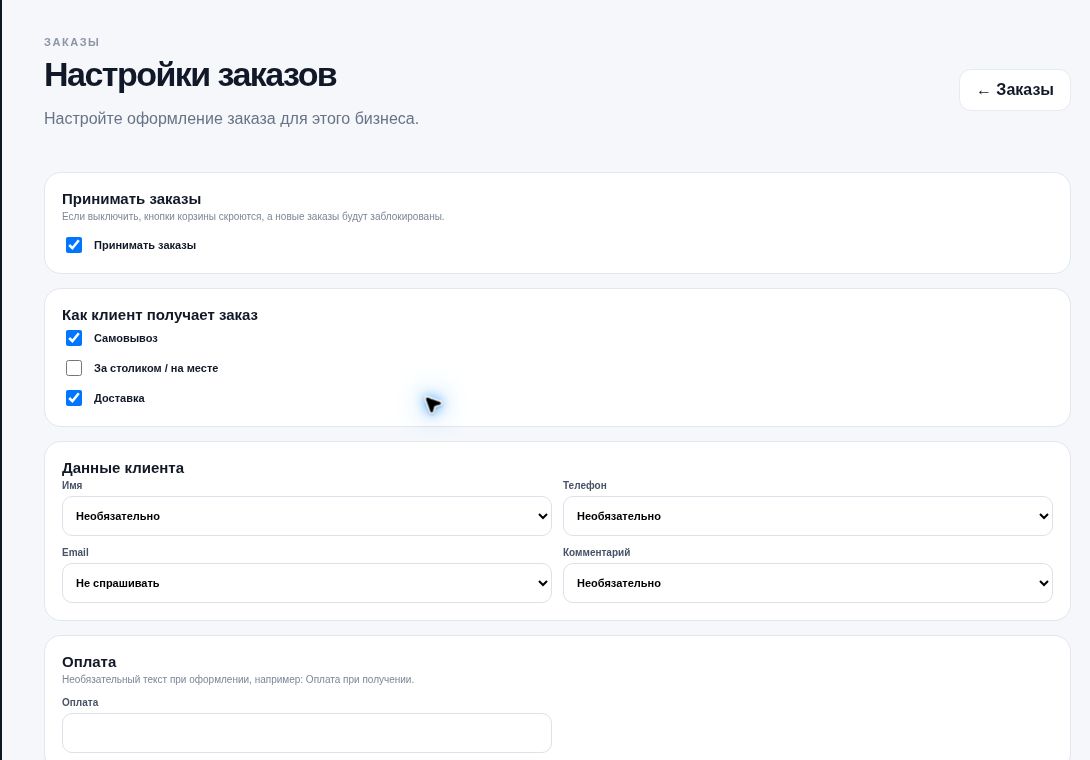
  1. “Orders” → “Order settings”Open the settings for this business.
  2. “Accept orders”Enable the cart and select pickup, at-table service, or delivery.
  3. “Email notifications” / “Telegram notifications” → “Save settings”Choose how your team hears about new orders and save the checkout settings.
ResultCustomers can place orders and your team gets alerts through the selected channels.
Order acceptance, fulfillment, and notification settings
05

Prepare the poster and permanent QR

The QR code already exists for your business. Design its poster after checking the catalog.

What to click

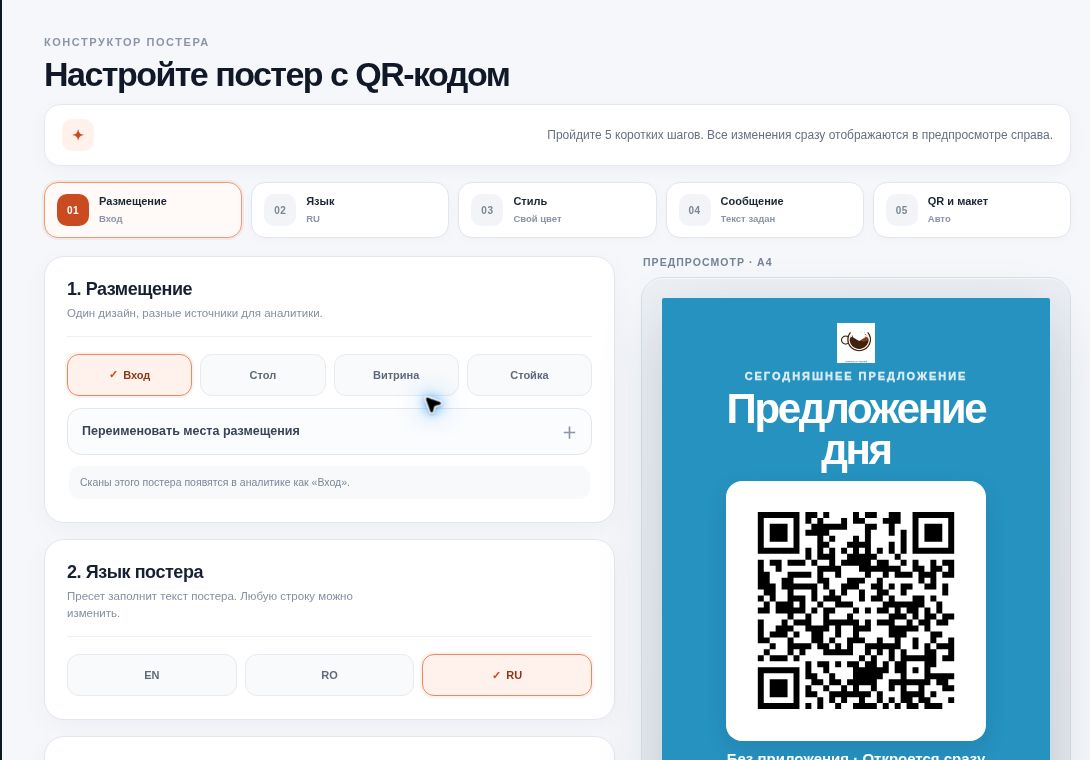
  1. “QR Poster” → “1. Placement”Choose Entrance, Table, Window, or Counter to track scans by placement.
  2. “3. Style” and “4. Message” → “Save poster”Set the look and message, then save the poster.
  3. “Download PNG”, “JPG”, or “Print poster”Get a print-ready file. Use “Copy link” for Instagram and messages.
ResultThe QR stays the same when you later change products and prices, so you do not have to reprint it.
Poster builder with placement, style, save, and download controls
06

Process incoming orders

New orders arrive in “Orders”. Use the attention queue so none are missed.

What to click

  1. “Orders” → “Needs attention”See new, accepted, and ready orders together.
  2. “Order details” → “Accept”Check items and customer details, then take the order.
  3. “Ready” → “Completed”Update the order as work progresses, or use “Cancel” if needed.
  4. “Download Excel”Export orders for the chosen period and status.
ResultYour team can see what still needs to happen for each order.
Order list with attention queue, details, and statuses
07

Review results and add locations

After launch, see which QR placements bring visitors. Create a separate business for each additional location.

What to click

  1. “Analytics”Review QR scans, link visits, and traffic sources.
  2. “+ Add business” → “Create business”Add another location with its own catalog, addresses, and QR.
  3. Business switcherSelect the correct location before editing products, posters, or orders.
ResultEach business keeps its own settings and reporting under one account.
Business switcher and add-location button

Short video overview

Update the catalog without reprinting the QR

After publishing, edit prices, photos, and products in Catalog. Your permanent link and printed QR still open the updated page.

QR-Appy · Dynamic QR offers · Digital catalog · Orders · Scan analytics

Ready to Create Your QR Catalog?

Create a business, add products to your catalog, and start receiving orders through a permanent QR code.